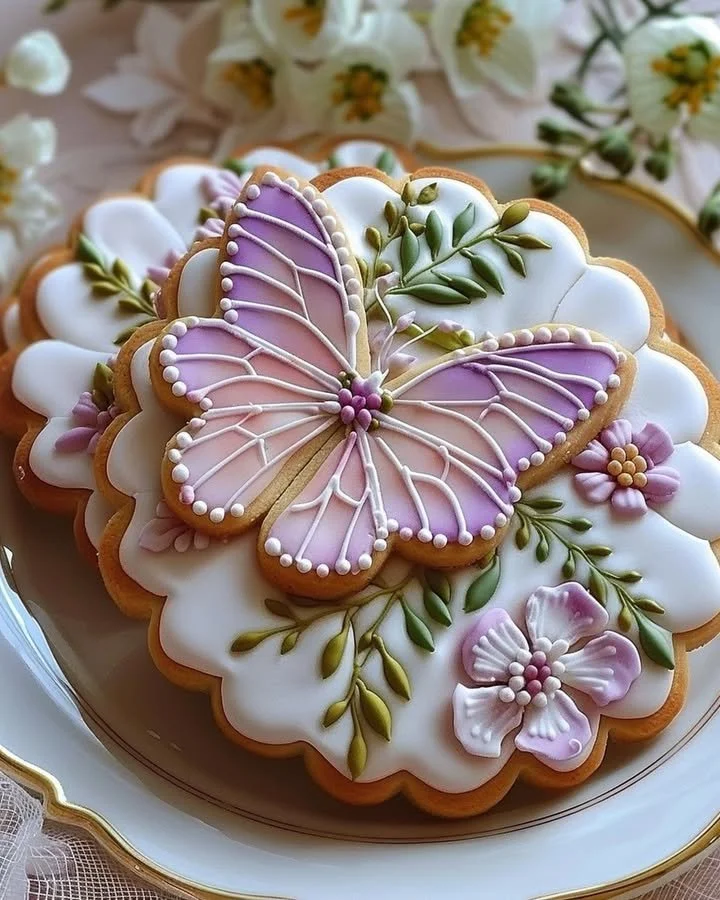
Floral Butter Cookies with Royal Icing
Indulge in the delicate delight of Floral Butter Cookies with Royal Icing, a recipe that brings joy to your kitchen through its charming aroma and delightful textures. In this step-by-step guide, we will explore every facet of this beautiful treat, from the creamy butter melting into a tender, golden-brown exterior to the bright and colorful royal icing that transforms these cookies into edible works of art. The sweetness lingers on your lips, evoking memories of festive gatherings, sunny afternoons, and cherished moments shared with loved ones. Prepare to embark on a culinary journey that fills your space with warmth, creativity, and a sprinkle of magic.
History / Fun Fact
The origins of cookies can be traced back to ancient times, but butter cookies, in particular, have a rich history, especially in Europe. Popularized by the French, buttery biscuits became a canvas for creativity, with flavors and shapes morphing over centuries. These Floral Butter Cookies pay homage to those times, marrying simplicity with elegance. Known for their versatility, they’ve adorned tables at celebrations, from tea parties to weddings. The addition of royal icing, with its vibrant colors and glossy finish, not only elevates their aesthetic appeal but allows for personalization that captures special moments in our lives.
Ingredients
To create these delightful cookies, you will need the following ingredients:
- 2 1/4 cups all-purpose flour, providing a fine texture that lends itself to easy rolling.
- 1/2 cup powdered sugar, adding a whisper of sweetness that dances on your tongue.
- 1 cup unsalted butter, softened, which brings richness and a creamy consistency.
- 1 teaspoon vanilla extract, infusing a warm, comforting aroma that fills the kitchen.
- 1/4 teaspoon almond extract (optional), offering a subtle hint of nuttiness for depth.
- 1/4 teaspoon salt, balancing the sweetness and enhancing flavors.
- 1 egg white or 3 tablespoons meringue powder, which will create a beautiful, glossy icing.
- 1 3/4 cups powdered sugar, providing the base for the royal icing’s dreaminess.
- 1/2 teaspoon lemon juice, brightening up the icing and adding a touch of freshness.
- Gel food colors (pink, purple, green, yellow), turning these cookies into a colorful palette of edible beauty.
Cooking Time & Tips For Floral Butter Cookies With Royal Icing
The cooking time for Floral Butter Cookies is relatively quick, allowing you to indulge in homemade goodness in under an hour. Prepare for about 10 minutes of baking time. However, the magical transformation achieved through royal icing requires a bit of patience, as they need to dry completely. If you’re looking for a quick kitchen adventure, aim for preparing the cookies in one session and allowing decorations to dry overnight.
Practical tips for success include ensuring your butter is at room temperature for easy creaming with the sugar. Use fresh ingredients for optimal flavor, and don’t shy away from experimenting with colors in your icing. The temperature of your kitchen can affect icing consistency, so if it’s warm, consider refrigerating your icing briefly.
Step-by-Step Directions
Preheat your oven to 350°F (175°C). The aroma of warming butter and sugar is soon to fill your kitchen. Line a baking sheet with parchment paper to ensure easy removal of the cookies once baked.
In a large bowl, cream together the softened butter and powdered sugar until light and fluffy. This is where the magic begins; the texture should resemble clouds, soft and airy.
Add the vanilla extract, almond extract (if using), and salt. Mix until combined, letting those comforting aromas waft through your space, creating an inviting atmosphere.
Gradually add the all-purpose flour, 1/4 cup at a time, until the dough comes together. Touch the dough—it’s like velvet, ready for the next step.
Roll out the dough on a lightly floured surface to about 1/4 inch thickness. As you roll, let your imagination soar; envision the floral designs you’ll create with each cookie shape.
Cut the dough into flower shapes using a cookie cutter and transfer them to the prepared baking sheet. Each delicate flower is a promise of indulgence.
Bake for 8-10 minutes or until the edges are slightly golden. As they bake, stay close to the oven—their fragrance is intoxicating! Let the cookies cool completely on a wire rack for that perfect crispy texture.
For the royal icing, whisk the egg white (or meringue powder) and lemon juice in a bowl until frothy, eagerly anticipating the transformation ahead.
Gradually add the powdered sugar, mixing until smooth and stiff peaks form. Look at that glossy icing—that’s the magic you’re after!
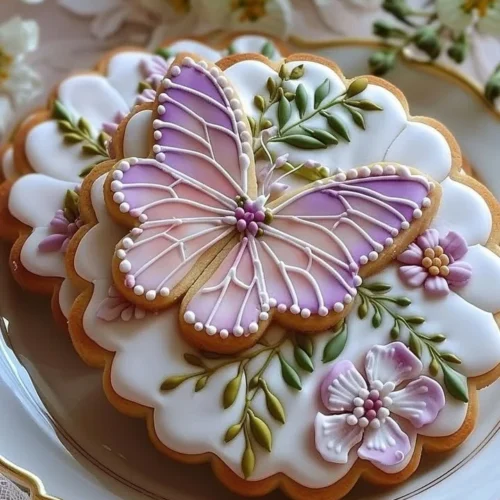
Divide the icing into separate bowls and add gel food coloring to create different hues. Explore your artistic side—mix shades to give depth to your floral patterns.
Fill piping bags with the royal icing and decorate the cookies. First, outline the shapes of the flowers, allowing your inner artist to shine. Then fill in with different colors, creating a rainbow of blooms on each cookie.
Allow the cookies to dry for at least 2-3 hours before serving or storing. This step builds anticipation, knowing that each flower will look stunning once dried.
Serving Suggestions & Occasions
These Floral Butter Cookies are the perfect treat for numerous occasions. They adorn tea parties, bridal showers, and anniversaries, delighting guests with their elegance and taste. Serve them alongside a cup of herbal tea, allowing the floral notes to complement the sweetness. Arranging them on a decorative tiered cake stand transforms them into a centerpiece, drawing everyone to their beautiful colors. They also make thoughtful gifts for friends, packaged in charming boxes adorned with ribbons. No matter the occasion, these cookies become a highlight, inviting everyone to relish in their beauty.
Common Mistakes For Floral Butter Cookies
Creating perfect Floral Butter Cookies can be a rewarding experience, but common mistakes can hinder your journey. One frequent error is under- or overmixing the dough; proper mixing enhances texture. Be mindful of oven temperatures; an oven that’s too hot can lead to burnt edges while maintaining a lower temperature helps achieve beautifully golden cookies. Not allowing the cookies to cool completely before icing can make decorations runny and less appealing. Lastly, when decorating with royal icing, balance the consistency to avoid drips while achieving vibrant colors.
Healthier Alternatives & Variations
For those looking to create a healthier version of these cookies, consider substituting some of the all-purpose flour with whole wheat flour, lending a nutty flavor and increased fiber content. You can also opt for a low-calorie sweetener in place of powdered sugar, adjusting flavors to suit your palate. If you’re avoiding butter, try coconut oil, providing a lovely texture with a hint of tropical aroma. For a unique twist, incorporate lemon or lavender essence, offering a refreshing touch that complements the floral design beautifully.
FAQs
Can I use margarine instead of butter?
Although margarine can be used, butter provides a richness and flavor that enhances the final product.How can I store the decorated cookies?
Store decorated cookies in an airtight container at room temperature for up to a week.Can I freeze these cookies?
Yes! Unfrosted cookies can last in the freezer for up to three months. Just ensure they are well-wrapped.What can I use instead of egg white for royal icing?
Meringue powder is an excellent alternative for creating royal icing without using egg whites.How do I achieve different textures with the icing?
For thicker icing, use less water. For a thinner, flood-style icing, add a little more water to achieve the desired consistency.Can I make these cookies vegan?
Yes! There are vegan alternatives for butter and egg whites, such as using a plant-based butter and aquafaba (chickpea brine).
Conclusion
Floral Butter Cookies with Royal Icing are not just a dessert; they are a delightful experience that resonates with creativity and love. Each bite offers a taste of artistry, while the floral designs turn these cookies into a visual feast. As you embark on this baking journey, the aromas will fill your space, and the vibrant colors will elevate your spirit. Don’t wait to indulge in this joyful recipe—gather your ingredients and start creating these enchanting treats today!
Floral Butter Cookies with Royal Icing
Ingredients
Cookie Ingredients
- 2 1/4 cups all-purpose flour providing a fine texture that lends itself to easy rolling
- 1/2 cup powdered sugar adding a whisper of sweetness that dances on your tongue
- 1 cup unsalted butter, softened which brings richness and a creamy consistency
- 1 teaspoon vanilla extract infusing a warm, comforting aroma
- 1/4 teaspoon almond extract (optional) offering a subtle hint of nuttiness for depth
- 1/4 teaspoon salt balancing the sweetness and enhancing flavors
Royal Icing Ingredients
- 1 large egg white or 3 tablespoons meringue powder to create a beautiful, glossy icing
- 1 3/4 cups powdered sugar providing the base for the royal icing’s dreaminess
- 1/2 teaspoon lemon juice brightening up the icing and adding a touch of freshness
- Gel food colors (pink, purple, green, yellow) to create colorful decorative icing
Instructions
Preparation
- Preheat your oven to 350°F (175°C) and line a baking sheet with parchment paper.
- In a large bowl, cream together the softened butter and powdered sugar until light and fluffy.
- Add the vanilla extract, almond extract (if using), and salt. Mix until combined.
- Gradually add the all-purpose flour, 1/4 cup at a time, until the dough comes together.
- Roll out the dough on a lightly floured surface to about 1/4 inch thickness.
- Cut the dough into flower shapes using a cookie cutter and transfer them to the prepared baking sheet.
Baking
- Bake for 8-10 minutes or until the edges are slightly golden and let the cookies cool completely on a wire rack.
Royal Icing Preparation
- Whisk the egg white (or meringue powder) and lemon juice in a bowl until frothy.
- Gradually add the powdered sugar, mixing until smooth and stiff peaks form.
- Divide the icing into separate bowls and add gel food coloring to create different hues.
- Fill piping bags with the royal icing and decorate the cookies, outlining the shapes and filling in with colors.
Finishing
- Allow the cookies to dry for at least 2-3 hours before serving or storing.