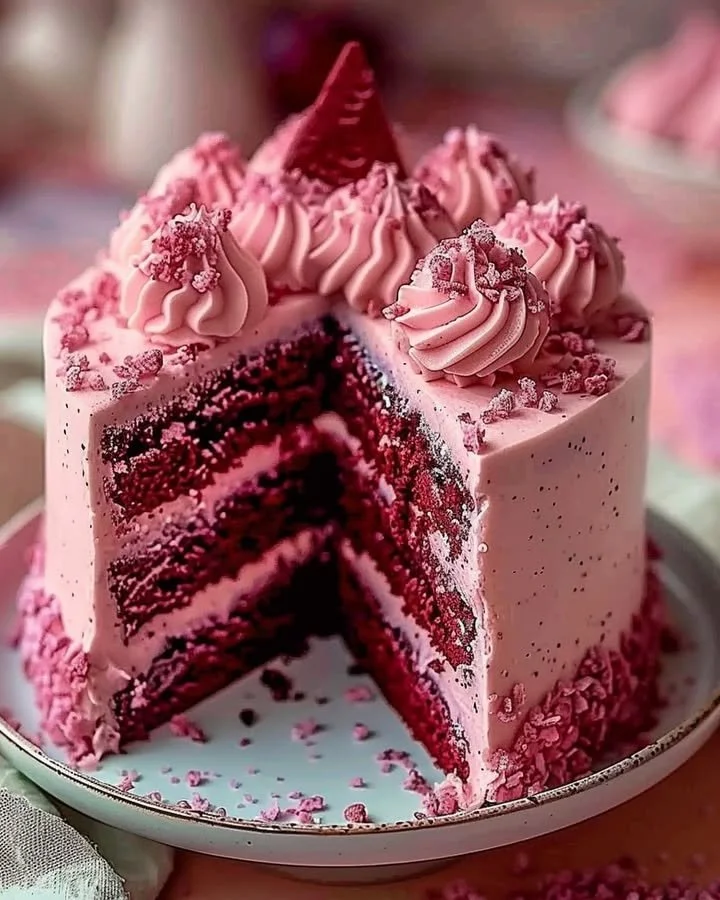
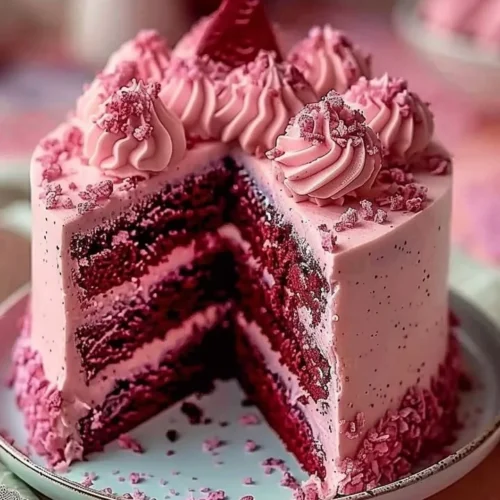
Pink Velvet Dream Cake
The allure of the Pink Velvet Dream Cake tantalizes our senses from the moment you step into the kitchen. The sight of its luscious layers, with a delicate blush hue, is enough to make your heart race. As you whisk ingredients together, the soft aromas of vanilla and a hint of cocoa weave through the air, promising nostalgia and happiness with every spoonful. This recipe invites you to embark on a fulfilling journey as we prepare a cake that is not only a feast for the eyes but also a joy for the palate. Follow along with this step-by-step guide that will lead you to create your very own piece of magic with the Pink Velvet Dream Cake.
History / Fun Fact
The origins of velvet cake can be traced back to the 19th century, with its evolution leading to the creation of its famous variant, red velvet cake, which gained popularity during the 1920s. The unique texture and brilliant color made it a favorite among dessert enthusiasts. However, as time progressed, bakers began experimenting with variants, leading to the delightful emergence of the Pink Velvet cake. This whimsical version exudes a romantic essence, making it a celebrated choice for weddings and special occasions. Shared stories often highlight how this cake brings people together, creating memories that linger long after the last crumb has disappeared.
Ingredients
As you embark on crafting this remarkable cake, gather the following ingredients, each one playing a vital role in bringing forth that signature pink velvet experience:
- 2 1/2 cups all-purpose flour: Silky and fine, creating the base for a tender crumb.
- 1 1/2 cups granulated sugar: Sweetness that balances flavors, ensuring that every bite is delightful.
- 1 tsp baking soda: The secret to that perfect rise, lending a lightness to each slice.
- 1 tsp salt: A touch of savory to enhance the sweetness.
- 1 tsp cocoa powder: Providing just a hint of chocolate depth without overwhelming the cake’s distinct flavor.
- 1 1/2 cups vegetable oil: The key to moist, lush layers that melt in your mouth.
- 1 cup buttermilk, at room temperature: Adding richness and tang for perfect balance.
- 2 large eggs, at room temperature: Binding everything together, creating a tender texture.
- 2 tbsp red food coloring: The star player, infusing the cake with its signature rosy hue.
- 1 tsp white vinegar: Enhancing the reaction with baking soda, contributing to the cake’s glorious fluffiness.
- 1 tsp vanilla extract: Filling your kitchen with sweet, warm aromas as it enhances all other flavors.
- 8 oz cream cheese, softened: The heart of the frosting, delivering a rich, tangy creaminess.
- 1/2 cup unsalted butter, softened: Adding relaxation and creaminess to the frosting’s texture.
- 4 cups powdered sugar: An element of sweetness that makes frosting simply irresistible.
- 1 tsp vanilla extract: Intensifying flavors in the frosting, rounding out the overall experience.
Cooking Time & Tips For Pink Velvet Dream Cake
Preparation can be quick or leisurely, each offering a unique experience. For those short on time, you can blend and bake this cake in about an hour, providing you with a spongy delight in no time. However, for those who wish to savor the process, take your time to enjoy each step, allowing yourself to be in the moment. Here are some practical tips to ensure your Pink Velvet Dream Cake is a success:
- Ensure your ingredients are at room temperature for optimal blending.
- Don’t overmix the batter, as this can lead to dense layers.
- Allow your cakes to cool completely before frosting to keep the frosting from melting.
- For a cleaner slice, use a serrated knife to level the cake layers before frosting.
Step-by-Step Directions
- Begin by preheating your oven to 350°F (175°C) to create the right atmosphere for baking.
- Prepare two 9-inch round cake pans by greasing and flouring them, ensuring your cake will slip out effortlessly once baked.
- In a large bowl, whisk together the all-purpose flour, granulated sugar, baking soda, salt, and cocoa powder. The blend should have a pleasant aroma, teasing your anticipation.
- In a separate bowl, combine the vegetable oil, buttermilk, eggs, red food coloring, white vinegar, and vanilla extract. Whisk until smooth; this mixture will transform your dry ingredients into a majestic batter.
- Gradually add the wet ingredients to the dry ingredients, stirring gently until just combined. Do not overmix—embracing some lumps will ensure a tender cake.
- Divide the batter evenly between the prepared pans, spreading it to the edges for even baking.
- Slide the pans into the oven and bake for 25-30 minutes. Keep an eye on them; they should rise beautifully and spring back when touched.
- Once baked, allow the cakes to cool in the pans for about 10 minutes. Carefully remove from the pans and transfer to a wire rack to cool completely.
- While the cakes cool, prepare the frosting by beating together the softened cream cheese and unsalted butter until creamy and smooth.
- Gradually add the powdered sugar and remaining vanilla extract, mixing until the frosting is light and fluffy, creating a texture that is reminiscent of cloud-like bliss.
- When the cakes are entirely cool, place one layer on a serving plate. Generously spread cream cheese frosting on top, letting it cascade to the edges.
- Top with the second cake layer and frost the top and sides with a lavish coat of the remaining frosting.
- For a finishing touch, get creative! Decorate with sprinkles, edible flowers, or artistic frosting designs that will draw everyone’s gaze.
Serving Suggestions & Occasions
The Pink Velvet Dream Cake is perfect for numerous occasions. Its striking color and delightful flavor make it a stellar centerpiece for birthdays, bridal showers, or even casual gatherings with friends. Serve it with a side of freshly whipped cream or a scoop of vanilla ice cream to add a chilling contrast to the cake’s richness. Pair it with a cup of herbal tea or a chilled glass of lemonade for a refreshing afternoon indulgence. The cake feels indulgent enough for a special occasion yet approachable for everyday moments, transforming the mundane into something magical.
Common Mistakes For Pink Velvet Dream Cake
- Overmixing the batter: This leads to a tough cake instead of a tender crumb. Be gentle!
- Incorrect oven temperature: An oven that is too hot or too cold can alter the cake’s rise and texture. Invest in an oven thermometer for accuracy.
- Skipping the cooling process: Frosting warm cakes leads to melting frosting and a messy presentation. Patience pays off!
- Not using room temperature ingredients: This can cause your batter to curdle, leading to uneven textures.
- Not testing for doneness: Relying solely on bake time can be misleading; always use a toothpick for assurance.
Healthier Alternatives & Variations
- Whole wheat flour: Substitute half or all of the all-purpose flour with whole wheat flour for an added nutritional boost.
- Greek yogurt in place of buttermilk: This adds protein while maintaining moisture.
- Natural food coloring: Use beet juice for the pink hue, creating a healthier and more natural alternative.
- Reduced sugar options: Experiment with natural sweeteners like maple syrup or honey, adjusting quantities based on flavor.
- Egg substitutes: For a vegan version, consider using flaxseed meal or applesauce in place of eggs.
FAQs
Can I make this cake ahead of time?
Yes, both the cake and frosting can be made a day in advance and stored separately in the refrigerator.Is there a gluten-free version of this cake?
Yes, you can substitute all-purpose flour with a gluten-free flour blend, ensuring to follow package instructions for ratios.How do I store leftovers?
Store any leftovers in an airtight container in the refrigerator for up to 5 days.Can I freeze this cake?
Absolutely! Wrap the cake layers tightly in plastic wrap and then in foil. They can be frozen for up to three months.What can I pair with this cake?
This cake is delightfully complemented by sweet berries, ice cream, or a refreshing cup of tea.How long does it take to make this cake?
The total time is about 1 hour and 15 minutes, including baking and cooling.
Conclusion
The Pink Velvet Dream Cake invites you to create something beautiful and delicious in the kitchen. Its tender, fluffy layers combined with the luscious cream cheese frosting capture the hearts of everyone who indulges. The process is as rewarding as the final result, filling your home with the sweet scents of baking. Why not gather your ingredients and bring this cake to life today? Your kitchen awaits the joyful adventure of making the Pink Velvet Dream Cake—one that promises to enchant and delight!
Pink Velvet Dream Cake
Ingredients
For the cake
- 2.5 cups 2 1/2 cups all-purpose flour Silky and fine, creating the base for a tender crumb.
- 1.5 cups 1 1/2 cups granulated sugar Sweetness that balances flavors.
- 1 tsp 1 tsp baking soda The secret to that perfect rise.
- 1 tsp 1 tsp salt A touch of savory to enhance the sweetness.
- 1 tsp 1 tsp cocoa powder Providing just a hint of chocolate depth.
- 1.5 cups 1 1/2 cups vegetable oil The key to moist, lush layers.
- 1 cup 1 cup buttermilk, at room temperature Adding richness and tang.
- 2 large 2 large eggs, at room temperature Binding everything together.
- 2 tbsp 2 tbsp red food coloring Infusing the cake with its signature rosy hue.
- 1 tsp 1 tsp white vinegar Enhancing the reaction with baking soda.
- 1 tsp 1 tsp vanilla extract Filling your kitchen with sweet, warm aromas.
For the frosting
- 8 oz 8 oz cream cheese, softened The heart of the frosting.
- 0.5 cup 1/2 cup unsalted butter, softened Adding relaxation and creaminess.
- 4 cups 4 cups powdered sugar An element of sweetness that makes frosting irresistible.
- 1 tsp 1 tsp vanilla extract Intensifying flavors in the frosting.
Instructions
Preparation
- Preheat your oven to 350°F (175°C).
- Prepare two 9-inch round cake pans by greasing and flouring them.
Making the Cake
- In a large bowl, whisk together the all-purpose flour, granulated sugar, baking soda, salt, and cocoa powder.
- In a separate bowl, combine the vegetable oil, buttermilk, eggs, red food coloring, white vinegar, and vanilla extract. Whisk until smooth.
- Gradually add the wet ingredients to the dry ingredients, stirring gently until just combined.
- Divide the batter evenly between the prepared pans.
- Bake for 25-30 minutes. The cakes should rise beautifully and spring back when touched.
- Allow the cakes to cool in the pans for about 10 minutes. Carefully remove and transfer to a wire rack to cool completely.
Making the Frosting
- Beat together the softened cream cheese and unsalted butter until creamy and smooth.
- Gradually add the powdered sugar and remaining vanilla extract, mixing until the frosting is light and fluffy.
Assembly
- When the cakes are entirely cool, place one layer on a serving plate and spread cream cheese frosting on top.
- Top with the second cake layer and frost the top and sides with the remaining frosting.
- Decorate with sprinkles, edible flowers, or artistic frosting designs.