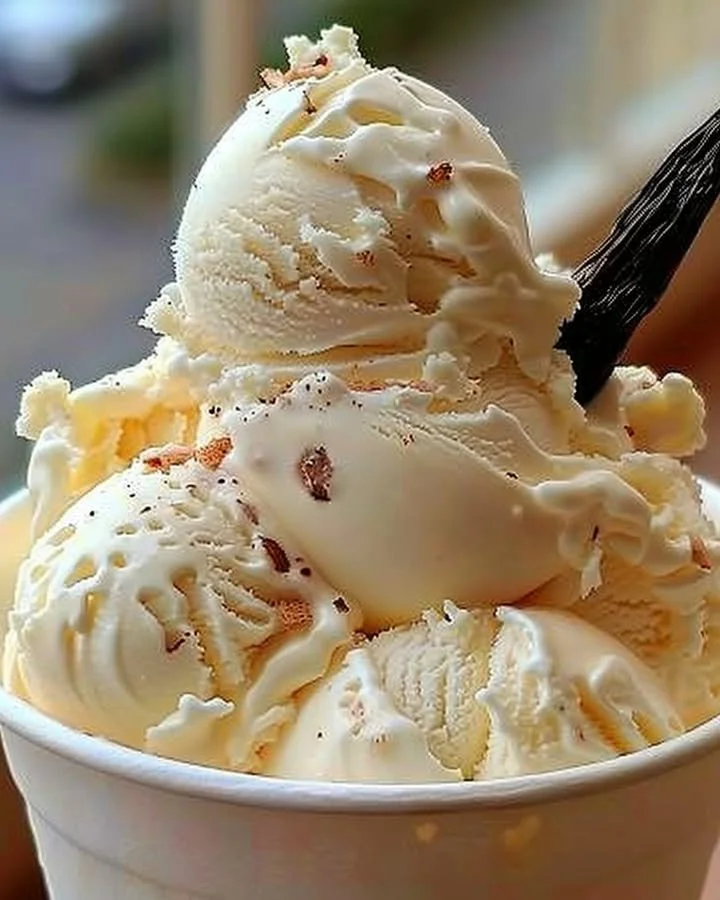
Homemade Vanilla Ice Cream is a delightful treat that brings the nostalgia of childhood summers right into your kitchen. There’s something simply magical about the rich, creamy texture and the sweet aroma of vanilla wafting through your home. This ice cream recipe is not only easy to make but also incredibly satisfying, offering a cooling comfort during hot days or a sweet end to any meal. Don’t be surprised if this dessert becomes a staple in your household; it has a magical way of bringing family and friends together.
Why You’ll Love This Recipe
You’ll absolutely adore this Homemade Vanilla Ice Cream recipe for several reasons. First, the prep is straightforward, making it suitable for novice bakers and experienced chefs alike. With just a handful of basic ingredients, you’ll find that it is a breeze to whip up. Plus, it’s a crowd-pleaser; everyone from toddlers to grandparents will be reaching for seconds. Whether you’re serving it at a birthday party, a summer barbecue, or enjoying a quiet evening at home, this vanilla ice cream is bound to leave everyone smiling. The minimal ingredients also mean you can enjoy rich flavors without unnecessary additives.
Ingredients
To create this luscious Homemade Vanilla Ice Cream, you’ll need the following ingredients:
- 2 cups (480ml) heavy cream: The key to the creamy texture that makes ice cream so irresistible, providing that satisfaction with every spoonful.
- 1 cup (240ml) whole milk: Gives the ice cream a silky smoothness, ensuring that it’s not too heavy.
- 3/4 cup (150g) granulated sugar: Adds just the right amount of sweetness to balance the rich creaminess.
- 1 vanilla bean (or 2 tsp pure vanilla extract): Infuses the ice cream with an aromatic, natural vanilla flavor that is worlds apart from artificial options.
- 4 large egg yolks: The secret ingredient that enriches the ice cream’s texture and flavor.
- A pinch of salt: Enhances all the flavors, making the sweetness shine.
Step-by-Step Directions
In a medium saucepan, combine the heavy cream, whole milk, and granulated sugar. Heat the mixture over medium heat, stirring occasionally until it’s hot, but make sure it does not boil. This gentle heating helps dissolve the sugar and creates a creamy base.
Split the vanilla bean in half lengthwise and scrape out the seeds using the back of a knife. Add both the seeds and the empty pod to the saucepan. If you’re using vanilla extract instead, wait until you remove the saucepan from the heat to add it.
In a separate bowl, whisk together the egg yolks with a pinch of salt until the mixture appears pale and slightly thickened. This will create a rich and creamy custard base.
Gradually pour a small amount of the hot milk mixture into the egg yolks while whisking constantly; this process is called tempering. It prevents the eggs from scrambling by gradually raising their temperature. Continue to add the hot mixture slowly until everything is fully combined.
Pour the entire egg mixture back into the saucepan with the milk and cream. Cook this mixture over low heat, stirring constantly, for about 5-10 minutes until it thickens slightly and coats the back of a spoon. At this stage, your house will smell heavenly!
Strain the custard through a fine-mesh sieve into a clean bowl to remove the vanilla bean pod and any curdled egg bits. This step helps achieve the smoothest texture possible.
Let the custard cool to room temperature, then cover it and refrigerate for at least 4 hours, or overnight if you have the time to spare. The longer it chills, the better the flavor!
Once your custard is chilled, churn it in an ice cream maker according to the manufacturer’s instructions. If you don’t have an ice cream maker, you can freeze it in an airtight container and stir every 30–60 minutes until it’s evenly frozen.
Transfer the churned ice cream to an airtight container and freeze it for at least 4 hours or until it’s firm. Your patience will be rewarded with the creamiest scoop you can imagine!
Tips & Tricks
Here are some tips to enhance your Homemade Vanilla Ice Cream experience. First, ensure that all your ingredients are very cold before you start. This helps your ice cream churn faster and leads to a creamier texture. If you want to experiment, consider adding mix-ins like chocolate chips, crushed cookies, or fruits for exciting flavor variations. If you’re using vanilla extract, look for high-quality pure extract for the best flavor. Lastly, don’t rush the chilling and churning process; it’s crucial for achieving that perfect creamy texture.
Serving Suggestions & Pairings
Homemade Vanilla Ice Cream is versatile and pairs beautifully with a variety of desserts. Serve it in a waffle cone for a classic summer treat or in a dish topped with fresh fruit for a refreshing contrast. It also makes a delightful companion to warm desserts like brownies or a slice of apple pie, creating a comforting contrast of hot and cold. Consider drizzling it with chocolate or caramel sauce for an indulgent touch. Perfect for birthdays, weekend barbecues, or even movie nights, this ice cream elevates any event.
Nutritional Information
While enjoying Homemade Vanilla Ice Cream, it’s essential to keep balanced nutrition in mind. Each serving (approximately 1/2 cup) contains about 250 calories, along with 15g of fat, 24g of carbohydrates, and 3g of protein. As with many treats, moderation is key, so you can savor this delightful homemade dessert without guilt.
Storing Tips & Variations
To ensure your Homemade Vanilla Ice Cream remains fresh, store it in an airtight container in the freezer. When properly sealed, it can last for up to two weeks, although it’s best enjoyed fresh. If you’re looking for variations, consider infusing the cream with different flavors—try steeping fresh mint leaves or crushed lavender for unique twists. You might also experiment with dairy-free alternatives by using coconut milk or almond milk for a different consistency and flavor.
Conclusion
Don’t hesitate to try this Homemade Vanilla Ice Cream recipe; it’s a perfect way to enjoy a timeless classic that everyone will love. Once you’ve made it, share your experiences with family and friends, and don’t be surprised when they request it again and again. Get ready to indulge in the creamy goodness of homemade ice cream right from your own kitchen!
FAQs
Can I make this ice cream without an ice cream maker?
Yes, you can! Pour the mixture into an airtight container and freeze it. Stir vigorously every 30 minutes until it’s frozen to achieve a creamier texture.How long does Homemade Vanilla Ice Cream last in the freezer?
When stored properly in an airtight container, it can last for about two weeks, but it’s always best enjoyed fresh.Can I use low-fat milk instead of whole milk?
Using low-fat milk will change the texture, making it less creamy. For the best result, stick to whole milk or heavy cream.How can I make this recipe vegan?
Replace heavy cream and whole milk with coconut cream or almond milk and use a vegan egg substitute to create a plant-based version.Can I add mix-ins to the ice cream?
Absolutely! Feel free to add chocolate chips, crushed cookies, or fruits during the last few minutes of churning for added flavor and texture.
Homemade Vanilla Ice Cream
Ingredients
Base Ingredients
- 2 cups heavy cream Provides rich, creamy texture.
- 1 cup whole milk Gives the ice cream a silky smoothness.
- 3/4 cup granulated sugar Balances the rich creaminess.
- 1 vanilla bean vanilla bean (or 2 tsp pure vanilla extract) Infuses the ice cream with natural vanilla flavor.
- 4 large egg yolks Enriches the texture and flavor.
- 1 pinch salt Enhances all flavors.
Instructions
Preparation of Base
- In a medium saucepan, combine the heavy cream, whole milk, and granulated sugar. Heat over medium heat, stirring occasionally until hot but do not boil.
- Split the vanilla bean in half lengthwise and scrape out the seeds. Add both seeds and the empty pod to the saucepan, or add vanilla extract after removing from heat.
- In a separate bowl, whisk together the egg yolks with a pinch of salt until pale and thickened.
- Gradually pour a small amount of the hot milk mixture into the egg yolks while whisking constantly to temper the eggs.
- Pour the entire egg mixture back into the saucepan and cook over low heat, stirring constantly, for about 5-10 minutes until thickened.
- Strain the custard through a fine-mesh sieve into a clean bowl to remove the vanilla bean pod.
Chilling and Churning
- Let the custard cool to room temperature, then cover and refrigerate for at least 4 hours or overnight.
- Churn the chilled custard in an ice cream maker according to the manufacturer’s instructions, or freeze in an airtight container, stirring every 30-60 minutes.
Final Freezing
- Transfer the churned ice cream to an airtight container and freeze for at least 4 hours or until firm.