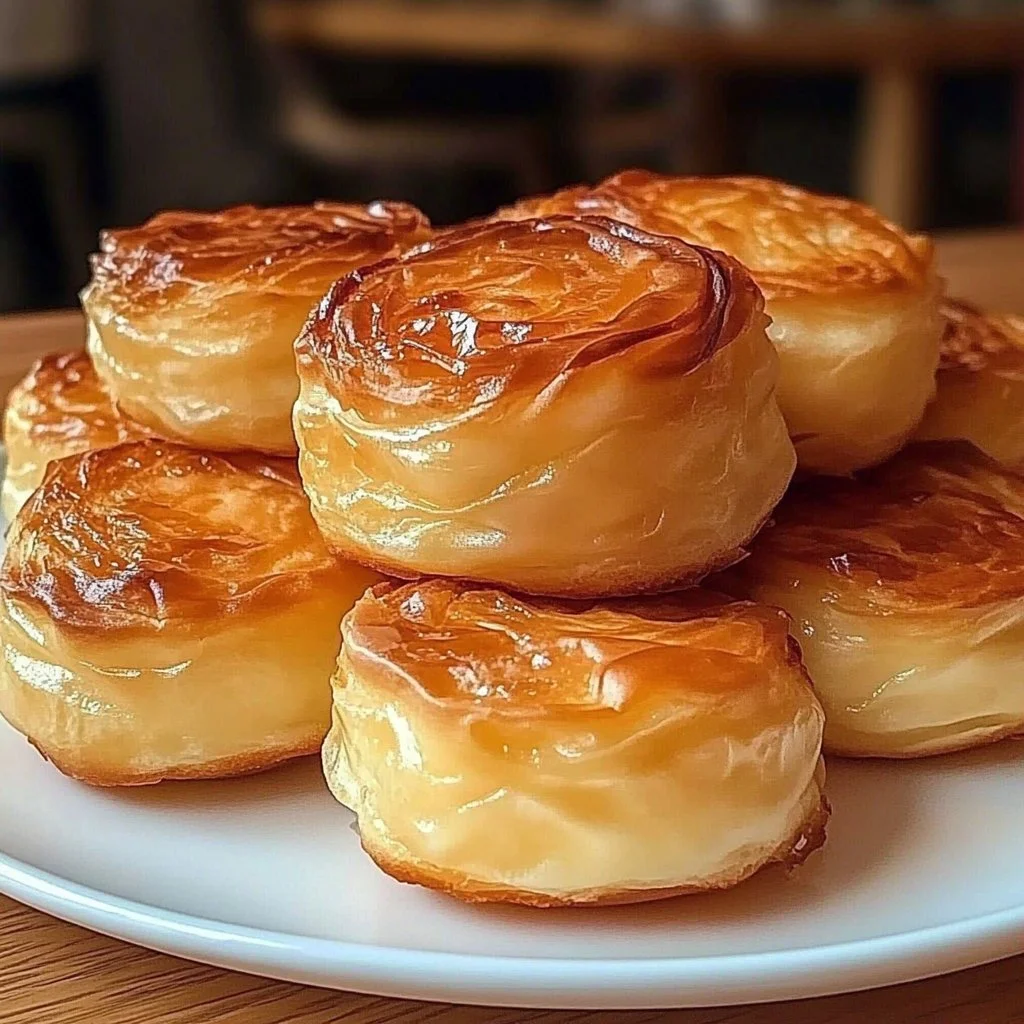
Nun’s Puffs at Home
There’s something irresistibly magical about homemade Nun’s Puffs that transports you back to simpler times. These delightful little pastries have a heavenly texture that is crispy on the outside while being soft and airy on the inside, making them an indulgent treat for any occasion. Each bite is a nostalgic hug, reminiscent of family gatherings and sweet surprises on special days. Cooking is often about creating memories, and this Nun’s Puffs recipe ensures joy and laughter are prevalent in your kitchen. Fast to whip up, kid-friendly, and utterly delicious, making these puffs is an experience you’ll cherish forever.
Why You’ll Love This Recipe
There are numerous reasons to fall head over heels for Nun’s Puffs. First off, the prep time is incredibly quick. In less than an hour, you can have a tray full of these warm, sweet delights ready to share. The ingredient list is minimal and straightforward, making it perfect even for novice bakers.
Moreover, these fluffy treats are a guaranteed crowd-pleaser with their universal appeal. Who wouldn’t adore a golden, puffy delight? They also offer versatility; serve them as a dessert for dinner parties, a sweet afternoon snack, or a fun breakfast treat. Plus, they’re delightful companions to coffee, tea, or even a scoop of ice cream.
Ingredients
For your Nun’s Puffs, gather these simple yet divine ingredients:
- 1 cup water: The base that brings it all together with a light touch.
- ½ cup unsalted butter: This gives it that rich, creamy essence, enveloping each puff in flavor.
- 1 cup all-purpose flour: The building block that creates that crispy exterior, ensuring every puff has a tender bite.
- 4 large eggs: The secret to that cloud-like fluffiness that will make your heart skip.
- ½ cup granulated sugar: A sweet kiss added to the dough, enhancing every morsel.
- 1 tsp baking powder: A tiny touch that helps each puff rise to perfection.
The combination of these ingredients is like a symphony, each element playing its part to create a treat so delightful that you might just want to savor it alone.
Timing
Making Nun’s Puffs is a beautiful balance of fast indulgence and luxurious results. You can whip these up relatively quickly, making them a fantastic option for those spontaneous cravings or last-minute gatherings. The enchanting aroma filling your home will make the wait nearly unbearable, but rest assured, the final result is worth every minute spent in the kitchen.
Step-by-Step
Creating these delightful Nun’s Puffs is easier than you might think. Follow this step-by-step guide to confectionery bliss:
Preheat oven to 425°F (220°C): This initial step sets the stage for your puffs to rise beautifully, creating that perfect golden exterior.
In a saucepan, combine water and butter over medium heat until melted: Witness the transformation of these simple ingredients as they meld together, filling your kitchen with warmth.
Remove from heat and stir in the flour until a dough forms: At this point, you’ll feel a sense of accomplishment, as the mixture begins to take on that lovely, smooth texture.
Allow the dough to cool slightly before adding eggs one at a time, mixing until smooth: This step is where the magic happens—watch the dough transform into a luxurious batter that promises fluffiness.
Stir in sugar and baking powder until well combined: Feel the sweetness and airiness intertwine, ready to rise into something spectacular.
Drop spoonfuls of dough onto a parchment-lined baking sheet: Each dollop is a promise of joy and indulgence waiting to happen.
Bake for about 20 minutes or until golden brown: As they rise, the lovely aroma will engulf you, and you’ll be eager to take that first bite.
Nutritional Information
While exact calories can vary depending on specific brands and measurements, each Nun’s Puff averages around 150 calories. Given their delightful nature, they can be considered an occasional indulgence. It’s all about balance; savoring these treats in moderation makes them even more special!
Healthier Alternatives
If you’re looking for healthier alternatives, consider these swaps:
- Low-sugar options: You can use a sugar substitute to reduce the sweetness while keeping the texture intact.
- Dairy-free swaps: Substitute the butter with coconut oil or a plant-based butter alternative for a dairy-free option.
These modifications ensure everyone can enjoy Nun’s Puffs without compromising their dietary preferences.
Serving Suggestions
These delightful puffs are surprisingly versatile:
- With ice cream: Drizzled with chocolate or caramel sauce, they transform into an elegant dessert.
- On holidays: Perfect for festive gatherings or Sunday brunch.
- With fresh fruit: Serve alongside berries or a fruit compote for a touch of freshness.
The versatility of Nun’s Puffs allows you to personalize them for any occasion, making them a delightful staple in your dessert repertoire.
Common Mistakes
When making Nun’s Puffs, avoid these common pitfalls:
- Overbaking: Keep an eye on them! Overbaking can result in dry puffs instead of the soft treats you desire.
- Texture issues: Ensure the dough cools slightly before adding eggs; this helps maintain the desired airiness.
- Messes: Line your baking sheet with parchment paper to keep things easy and prevent sticking.
These tips will ensure your Nun’s Puffs come out perfect every time!
Storing Tips
To keep your Nun’s Puffs fresh:
- If you have leftovers, store them in an airtight container at room temperature for up to two days.
- For longer storage, freeze portions by placing them in an airtight freezer bag. Reheat in the oven at 350°F (175°C) for about 10 minutes for that freshly-baked flavor.
Proper storing will preserve their fluffy nature, allowing you to enjoy them even days after baking!
Conclusion
There’s something oddly satisfying about pulling a tray of Nun’s Puffs out of the oven. Their golden brown exterior and enticing aroma is enough to make anyone weak at the knees. Get your kitchen prepped and your heart ready, as this dessert is an experience waiting to happen. With each puff, you’re not just baking—you’re creating a piece of delicious nostalgia.
So, roll up your sleeves, gather your ingredients, and tempt your taste buds to bake these sweet morsels at home ASAP!
FAQs
Can Nun’s Puffs be made ahead of time?
Yes, you can prepare the dough in advance and refrigerate it for a few hours before baking.Are Nun’s Puffs gluten-free?
Unfortunately, traditional recipes require all-purpose flour. However, gluten-free flour can be experimented with for a gluten-free version.Can I add flavors like vanilla or almond?
Absolutely! A splash of vanilla or almond extract will add a unique twist to the flavor profile.How do I know if they are done baking?
They should be golden brown and puffed up. A light touch will indicate they are done when they feel firm.Can I use a different type of flour?
While all-purpose flour offers the best result, you can try cake flour, but keep in mind the texture may vary.What can I do if my puffs don’t rise?
Ensure that your baking powder is fresh and that you mix the dough properly without overmixing.Are Nun’s Puffs suitable for children?
Yes! They are kid-friendly and make for a fun baking activity to do together.
Nun’s Puffs at Home
- Total Time: 35 minutes
- Yield: 4 servings 1x
- Diet: Vegetarian
Description
Delightful homemade Nun’s Puffs that are crispy on the outside and soft on the inside, perfect for any occasion.
Ingredients
- 1 cup water
- ½ cup unsalted butter
- 1 cup all-purpose flour
- 4 large eggs
- ½ cup granulated sugar
- 1 tsp baking powder
Instructions
- Preheat oven to 425°F (220°C).
- In a saucepan, combine water and butter over medium heat until melted.
- Remove from heat and stir in the flour until a dough forms.
- Allow the dough to cool slightly before adding eggs one at a time, mixing until smooth.
- Stir in sugar and baking powder until well combined.
- Drop spoonfuls of dough onto a parchment-lined baking sheet.
- Bake for about 20 minutes or until golden brown.
Notes
Ensure the dough cools slightly before adding eggs to maintain airiness. Store leftovers in an airtight container for up to two days.
- Prep Time: 15 minutes
- Cook Time: 20 minutes
- Category: Dessert
- Method: Baking
- Cuisine: American
Nutrition
- Serving Size: 1 serving
- Calories: 150
- Sugar: 6g
- Sodium: 200mg
- Fat: 8g
- Saturated Fat: 5g
- Unsaturated Fat: 3g
- Trans Fat: 0g
- Carbohydrates: 20g
- Fiber: 1g
- Protein: 3g
- Cholesterol: 75mg