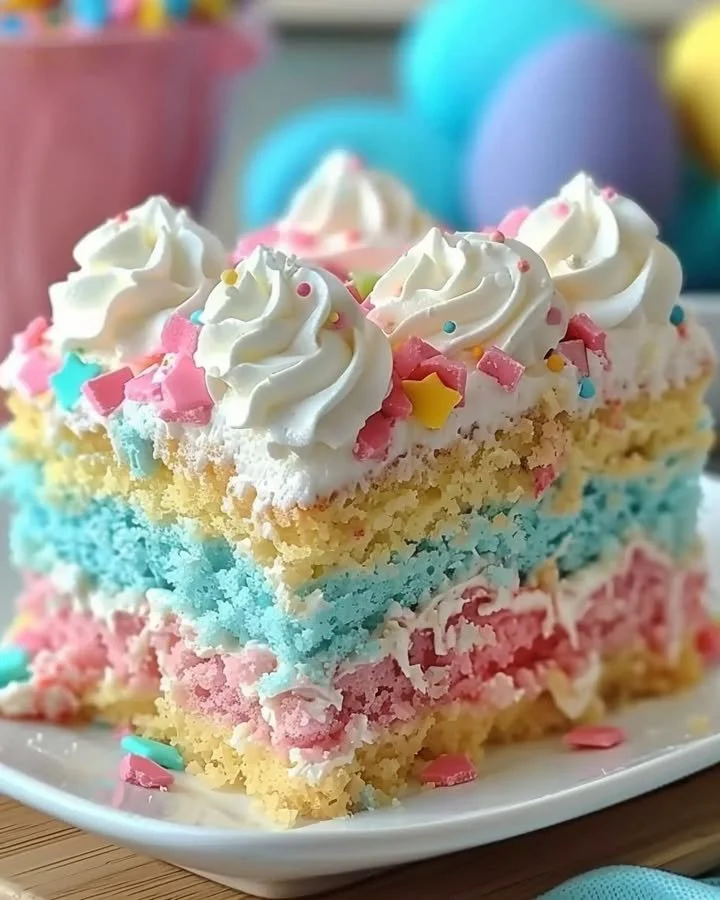
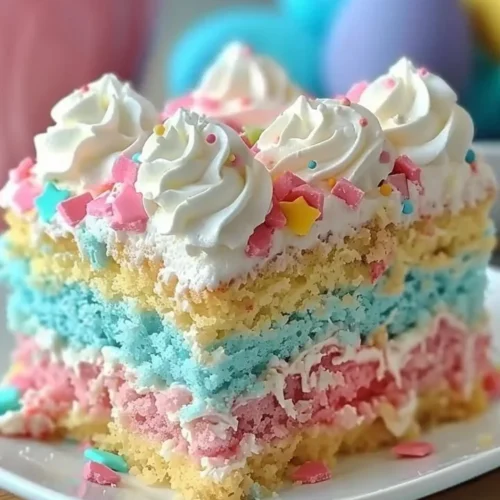
Festive Easter Bunny Poke Cake with Creamy Frosting
With the arrival of spring, the air fills with the sweet aroma of blooming flowers and the promise of joyous celebrations. One delightful recipe that captures the essence of this season is the Festive Easter Bunny Poke Cake with Creamy Frosting. This whimsical dessert immerses you in memories of joyful family gatherings, laughter, and love. Imagine soft and tender layers of cake drizzled with a luscious blend of sweetened condensed milk, crowned with a creamy whipped topping that beckons you to indulge. As you take a bite, the airy frosting melts in your mouth, mingling with the vibrant textures of coconut flakes that mimic fluffy bunny fur. This recipe is indeed a step-by-step journey to create a captivating centerpiece for your Easter festivities.
History / Fun Fact
The origin of poke cakes dates back to the 1970s, when home bakers took the classic concept of cakes to a new level. The idea was simple: after baking a cake, you poke holes in it and pour a delicious liquid—often a sweet syrup or pudding—into the holes. This technique not only enhances the moisture and flavor of the cake, but it also provides an interactive element to cake-making. The Festive Easter Bunny Poke Cake celebrates the charm of spring and the joy of Easter, melding the tradition of poke cakes with seasonal themes. With its playful bunny decor and inviting colors, it embodies the spirit of Easter gatherings, reminding us of the importance of family and shared moments.
Ingredients
To create your delectable Festive Easter Bunny Poke Cake, gather the following ingredients:
- 1 box of yellow cake mix (for a tender, buttery flavor)
- 3 large eggs (to enrich the texture, making it fluffy)
- 1/2 cup vegetable oil (to keep the cake moist and light)
- 1 cup water (for the perfect batter consistency)
- 1 can of sweetened condensed milk (for its creamy sweetness)
- 1 cup of coconut flakes (to create a fluffy, snowy topping)
- 1 container of whipped topping (like Cool Whip, for a light, airy finish)
- 1 cup of pastel-colored candy eggs (optional, for a playful touch)
- Green food coloring (optional, to enhance the “grass” effect)
Each ingredient is carefully chosen to ensure your cake is not only delicious but also an eye-catching treat that will delight guests of all ages.
Cooking Time & Tips For Festive Easter Bunny Poke Cake
When it comes to preparing your Festive Easter Bunny Poke Cake, you have the option of a quick preparation or a more leisurely baking experience. The quick method involves a straightforward approach: following the box instructions for the cake mix and allowing it to cool before poking holes. Alternatively, if you have more time, you can embrace the slow preparation method, allowing your creativity to expand as you experiment with flavors, frostings, and decorations.
For the best results, remember these practical tips: ensure your cake is completely cooled before poking holes to prevent the sweetened condensed milk from running off. Additionally, keeping the cake in the refrigerator for a few hours helps the flavors meld beautifully, making each bite a harmonious explosion of taste.
Step-by-Step Directions
Let’s create your Festive Easter Bunny Poke Cake together!
Preheat the oven to 350°F (175°C) and prepare your favorite 9×13-inch baking dish by greasing and dusting it with flour. This step is essential to ensure that your cake releases effortlessly.
In a large mixing bowl, combine the yellow cake mix, eggs, vegetable oil, and water. Use a whisk or electric mixer to blend the ingredients until the batter is smooth and creamy. The aroma of the sweet batter will fill your kitchen, teasing your senses.
Pour the batter into the prepared baking dish, spreading it evenly with a spatula. Then, gently slide it into the oven, letting it bake for 25-30 minutes. While it bakes, the golden cake will rise beautifully, and the soft, buttery scent will envelop your space.
Once baked, use a toothpick to check for doneness; it should come out clean when inserted into the center. Allow the cake to cool for about 10-15 minutes, relishing the anticipation building in the air.
Now comes the fun part! With the handle of a wooden spoon, poke holes evenly across the surface of the warm cake. Feel the gentle resistance as you create the perfect spaces for the sweet condensed milk.
In a small bowl, mix the can of sweetened condensed milk with a few drops of green food coloring to give it a whimsical touch. Pour this mixture generously over the holes in the cake, allowing it to seep into every nook and cranny. The sweet aroma will deepen, enticing everyone in the house.
After pouring, let the cake cool completely in the refrigerator for at least 2 hours, allowing the flavors to combine and the cake to set properly.
Once chilled, generously spread a layer of whipped topping over the cake using a spatula. The fluffy, airy texture will float atop the cake like clouds.
To create your fluffy bunny fur, sprinkle coconut flakes generously over the frosting. Use your creative touch to make the cake visually delightful.
Finally, adorn your cake with pastel-colored candy eggs tucked among the coconut flakes for a vibrant pop of color that screams “Easter!” Now step back and admire your work of art before serving.
Serving Suggestions & Occasions
The Festive Easter Bunny Poke Cake is the perfect centerpiece for your Easter brunch or spring celebrations. It invites heartwarming conversations and laughter as family and friends gather around the table. To elevate the experience, serve the cake alongside refreshing beverages like lemonade or iced tea. For an interactive twist, encourage guests to “decorate” their slices with extra coconut and candy eggs. It’s not just a dessert; it’s an invitation to play, reminisce, and create cherished memories together.
Common Mistakes For Festive Easter Bunny Poke Cake
While making your Festive Easter Bunny Poke Cake, there are a few common pitfalls to avoid. One frequent mistake is not allowing the cake to cool completely before pouring the condensed milk mixture. This step is critical to ensure the milk seeps into the holes rather than running off. Another common issue is using too much or too little frosting; aim for an even and generous layer to maintain balance. Lastly, don’t skip the refrigerating step! Chilling the cake allows the flavors to meld beautifully, transforming it into the star of your Easter celebration.
Healthier Alternatives & Variations
For those looking to lighten up this treat, consider these healthier alternatives: substitute the yellow cake mix with a gluten-free or whole grain variety. You can also replace the sweetened condensed milk with a light coconut milk or almond milk for a dairy-free version. For the frosting, opt for a reduced-fat whipped topping or make your homemade Greek yogurt topping for added protein. Additionally, add natural fruit flavors—like strawberries or raspberries—for a refreshing twist on this classic dessert.
FAQs
Can I make the cake ahead of time?
Yes! You can bake and cool the cake a day in advance. Just make sure to store it properly in the refrigerator to maintain freshness.Is there a way to make it gluten-free?
Absolutely! Substitute the yellow cake mix with gluten-free cake mix and follow the package instructions.Can I customize the decorations?
Of course! Feel free to use different candies or toppings to suit your family’s taste or to match your party theme.How long does this cake last after making it?
The cake can be stored in the refrigerator for up to five days, but it’s best enjoyed fresh within the first two days.Can I freeze the cake?
Yes, you can freeze the unfrosted cake for up to 3 months. Just be sure to wrap it well in plastic wrap and then foil.What can I serve with the cake?
This cake pairs wonderfully with fresh fruit or a scoop of sorbet for a refreshing contrast to its sweetness.
Conclusion
The Festive Easter Bunny Poke Cake with Creamy Frosting is more than just a dessert; it’s a delightful celebration of flavors, textures, and memories. Each bite is a gateway to cherished moments with loved ones, filled with laughter and warmth. Whether you’re planning an Easter gathering or simply want to brighten your spring days, this poke cake promises to bring smiles to everyone. Experience the joy of creating this vibrant confection right in your kitchen; your family and friends will be captivated by its charm and scrumptiousness. Don’t wait—gather your ingredients and embark on this delightful culinary adventure today!
Easter Bunny Poke Cake
Ingredients
For the Cake
- 1 box yellow cake mix for a tender, buttery flavor
- 3 large eggs to enrich the texture, making it fluffy
- 1/2 cup vegetable oil to keep the cake moist and light
- 1 cup water for the perfect batter consistency
For the Filling and Topping
- 1 can sweetened condensed milk for its creamy sweetness
- 1 cup coconut flakes to create a fluffy, snowy topping
- 1 container whipped topping like Cool Whip, for a light, airy finish
- 1 cup pastel-colored candy eggs optional, for a playful touch
- Green food coloring optional, to enhance the 'grass' effect
Instructions
Preparation
- Preheat the oven to 350°F (175°C) and prepare your favorite 9x13-inch baking dish by greasing and dusting it with flour.
- In a large mixing bowl, combine the yellow cake mix, eggs, vegetable oil, and water. Use a whisk or electric mixer to blend the ingredients until the batter is smooth.
- Pour the batter into the prepared baking dish and spread it evenly with a spatula.
Baking
- Bake for 25-30 minutes, checking for doneness with a toothpick.
- Allow the cake to cool for about 10-15 minutes.
Poking and Filling
- Poke holes evenly across the surface of the warm cake with the handle of a wooden spoon.
- In a small bowl, mix the can of sweetened condensed milk with green food coloring. Pour this mixture generously over the holes in the cake.
- Let the cake cool completely in the refrigerator for at least 2 hours.
Topping
- Spread a layer of whipped topping over the chilled cake.
- Sprinkle coconut flakes over the frosting to create fluffy bunny fur.
- Decorate with pastel-colored candy eggs.