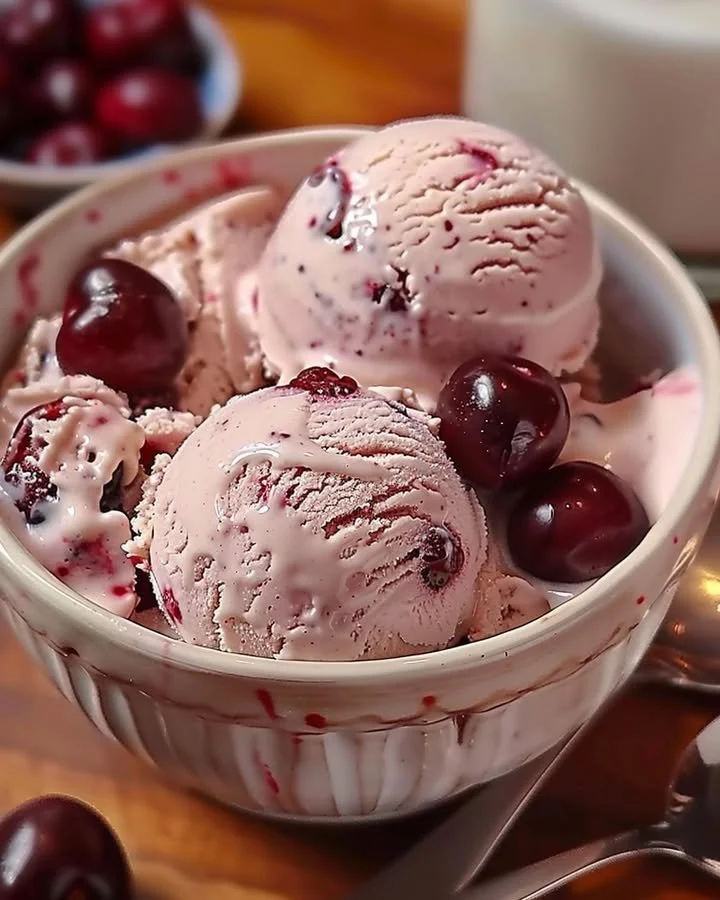
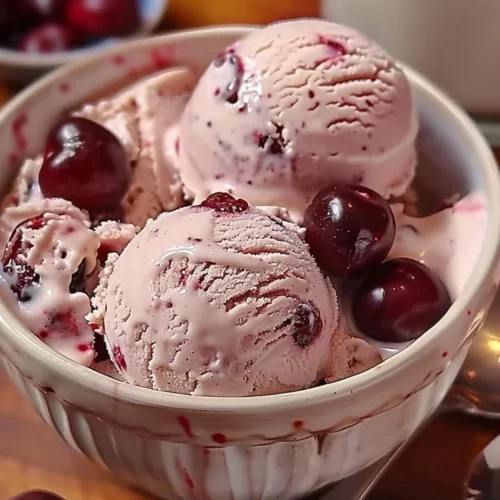
Homemade Cherry Vanilla Ice Cream
The sweet allure of Homemade Cherry Vanilla Ice Cream calls to anyone who dreams of a dessert that captures the joys of summer. With its dreamy, creamy texture, this recipe invites you into a step-by-step experience that will tantalize your taste buds. Imagine the luscious creaminess melting in your mouth, intertwined with the bright, sweet-tart bursts of cherries, leaving you craving more. Each scoop is velvety, rich, and perfectly balanced, turning any day into a celebration.
The origins of cherry ice cream date back to the 19th century, when ice creams began to evolve from a luxurious treat into a staple dessert in America. Influenced by the bounty of local fruits, cherries became a popular addition. This delightful combination of fresh cherries and vanilla reflection of summertime nostalgia quickly transformed into a beloved classic, reminding us of sunlit picnics and warm evenings. This Homemade Cherry Vanilla Ice Cream recipe is not just about satisfaction; it’s about crafting memories that linger long after the last spoonful.
To create your very own batch of this delicious treat, you will need the following ingredients:
- 2 cups heavy cream: Rich and creamy, this forms the base that brings lusciousness to every bite.
- 1 cup whole milk: Adding a smooth consistency, it plays perfectly with the cream for a dreamy base.
- 3/4 cup granulated sugar: Sweetness in balance, it makes the ice cream indulgently enjoyable.
- 1 tablespoon vanilla extract: Aromatically potent, vanilla brings warmth and depth to the flavor profile.
- 1 cup fresh or frozen cherries, pitted and chopped: Bursting with flavor, these juicy gems add a refreshing tang.
- 1/2 teaspoon salt: Enhancing every element, salt is the secret that elevates the entire experience.
- Optional: additional cherries for serving: These add a delightful finishing touch, inviting you to dive in.
Creating Homemade Cherry Vanilla Ice Cream can be a quick or leisurely endeavor. A quick preparation allows you to whip up a batch in no time, ideally suited for spontaneous cravings. For a leisurely approach, consider infusing flavor during preparation, granting the base time to harmonize before freezing.
For a joyful experience, ensure your ice cream maker is chilled and ready before you begin. This ensures the perfect texture during the freezing process. Moreover, feel free to taste along the way—culinary creativity starts with savoring every step. Pouring the mixture into the ice cream maker is both thrilling and satisfying; witness your creation begin to take shape.
Step-by-Step Directions:
In a mixing bowl, combine the heavy cream, whole milk, granulated sugar, vanilla extract, and salt. As you stir, allow the sugar to dissolve fully, creating a silky mixture that promises indulgence.
Add the pitted and chopped cherries, stirring gently to distribute them evenly throughout the creamy blend. Envision the colorful specks of red dancing within the smooth backdrop, a visual delight that foreshadows the deliciousness.
Pour this enticing mixture into your ice cream maker, following the manufacturer’s instructions. The anticipation builds as the machine begins to churn, transforming liquid dreams into rich ice cream.
When the ice cream reaches a soft-serve consistency, it’s time to transfer it into an airtight container. The sound of the pour is music to your ears, hinting at the creamy dessert to come that awaits in the freezer.
Freeze the mixture for at least 4 hours or until it’s firm enough to scoop. During this waiting period, allow the excitement to build within you—a reward that will be well worth every minute.
When ready to serve, scoop generous portions into bowls, adding a few extra cherries on top if desired. Each spoonful will be a colorful celebration, beckoning you to revel in this delightful treat.
Homemade Cherry Vanilla Ice Cream is perfect for an array of occasions, from dreamy summer afternoons with family to cozy gatherings with friends. Serve it at birthday parties, or simply enjoy it as a sweet escape to brighten your day. Pairing it with angel food cake or warm brownies can elevate your dessert experience to new heights.
While the joy of making ice cream is abundant, some common mistakes can hinder your success. Over-churning can lead to hard ice cream, while under-churning may yield a too-soft texture. Not allowing the mixture to chill sufficiently before freezing can also result in ice crystals, affecting your ice cream’s creaminess. Keep an eye on the freezing time, as impatience can lead to uneven results.
If you’re looking for healthier alternatives or variations, consider swapping in coconut milk for a dairy-free ice cream. You can ramp up the cherry flavor by incorporating a swirl of cherry purée during the freezing process, enhancing both the taste and presentation. Experimenting with mix-ins like crushed nuts or chocolate chips can provide additional texture and flavor profiles that you’ll want to explore.
FAQs:
Can I use frozen cherries instead of fresh?
Absolutely! Frozen cherries work perfectly in this recipe and can be more convenient when fresh ones are unavailable.How long does Homemade Cherry Vanilla Ice Cream last?
If stored properly in an airtight container, it can last up to two weeks in the freezer, but it’s best enjoyed within a week for optimal flavor.Can I add other fruits to this recipe?
Yes! Feel free to mix in strawberries or blueberries for a berry medley, adjusting the sugar accordingly based on sweetness.Is there a non-dairy version of this ice cream?
You can substitute the heavy cream and milk with coconut milk or almond milk for a delightful non-dairy alternative.What is the best way to store leftover ice cream?
Store it in an airtight container to prevent it from picking up odors from the freezer or crystallizing.Can I make this without an ice cream maker?
While an ice cream maker provides the best texture, you can freeze the mixture in a shallow container and stir every 30 minutes until fully frozen for a homemade alternative.
Delight in the experience of creating your own Homemade Cherry Vanilla Ice Cream—every step, every taste, every scoop is an opportunity to celebrate summer. With its perfect marriage of flavor and texture, this dish is an embrace of nostalgia and joy. Don’t wait another moment; start your ice cream journey today, and gift yourself a refreshing treat that will make your heart sing!
Homemade Cherry Vanilla Ice Cream
Ingredients
Ice Cream Base
- 2 cups heavy cream Rich and creamy, forms the base.
- 1 cup whole milk Adds a smooth consistency.
- 3/4 cup granulated sugar Sweetness in balance.
- 1 tablespoon vanilla extract Brings warmth and depth to flavor.
- 1 cup fresh or frozen cherries, pitted and chopped Adds refreshing tang.
- 1/2 teaspoon salt Enhances every element.
Optional Garnish
- as needed additional cherries for serving Adds a delightful finishing touch.
Instructions
Mixing
- In a mixing bowl, combine the heavy cream, whole milk, granulated sugar, vanilla extract, and salt. Stir until the sugar dissolves fully.
- Add the pitted and chopped cherries, stirring gently to distribute them evenly.
Churning
- Pour the mixture into your ice cream maker, following the manufacturer’s instructions. Allow it to churn until it reaches a soft-serve consistency.
Freezing
- Transfer the ice cream to an airtight container and freeze for at least 4 hours or until firm enough to scoop.
Serving
- Scoop into bowls and add additional cherries on top if desired. Enjoy the colorful celebration!